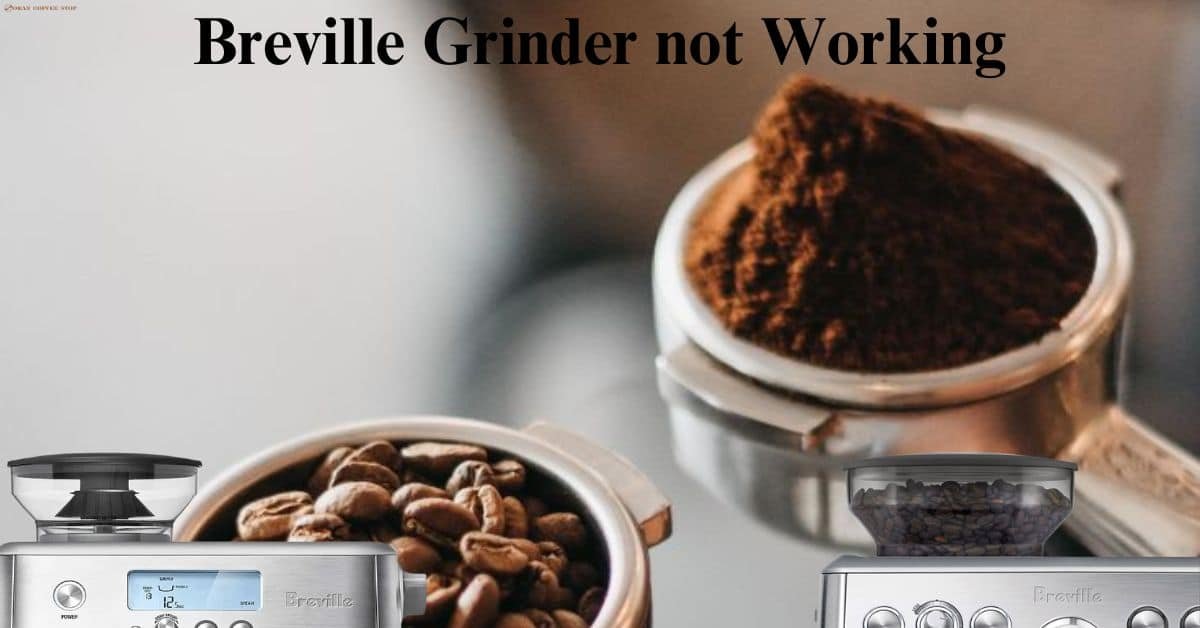
Breville coffee makers are known for their high quality and performance. However, like any appliance, they can experience problems from time to time. One of the most common problems with Breville coffee makers is with the grinder. The grinder can become clogged, jammed, or not grind the beans evenly. This can lead to poor-tasting coffee or even damage to the machine.
In this article, we will discuss the most common Breville coffee maker with grinder problems and how to troubleshoot and fix them. Below are some of the most common Breville grinder problems You can try the following troubleshooting quick tips to fix them:
| Possible Reasons | How to Fix |
|---|---|
| The grinder is not grinding the beans evenly. | Check the grind settings for the coffee type you’re using. The grind size should be appropriate for the brewing method you are using. For example, a coarser grind is needed for drip coffee, while a finer grind is needed for espresso. Check for damaged burrs. If the burrs are damaged, they will not be able to grind the beans evenly. |
| The grinder is clogged. | Follow the manufacturer’s instructions to clean the grinder. This usually involves removing the burrs and cleaning them with a brush or vacuum cleaner. Descale the grinder if necessary. Mineral deposits can build up in the grinder and cause it to clog. Descaling removes these deposits. |
| The grinder is jammed. | Clean the burrs thoroughly and attempt grinding again. If the grinder is still jammed, you may need to disassemble it and clean it more carefully. |
| The grinder is not turning on. | Check that the machine is plugged in and turned on or test the coffee maker in a different electrical outlet to rule out power issues. Check the fuse. If the fuse is blown, replace it with a new one. |
| The grinder is making a loud noise. | Inspect the condition of the grinder’s burrs. If the burrs are damaged, they can make a loud noise when they grind the beans. Address any motor issues; If the motor is malfunctioning, it can also make a loud noise. |
Common Mistakes While Using a Breville Grinder
Certainly, here are some common mistakes that people might make when using a Breville coffee maker grinder.
Using Wrong Grind Size for Espresso Breville
One of the most common reasons why a Breville grinder might not be working is that it uses the wrong grind size for the brewing method. The grind size affects the extraction rate, which is the amount of coffee flavor that is extracted from the beans. The ideal grind size will vary depending on the brewing method.
For drip coffee, a medium-coarse grind is generally preferred. This allows the water to flow through the coffee grounds quickly enough to extract the desired flavor without over-extracting the coffee and making it bitter.
For espresso, a fine grind is required. This allows the water to flow through the coffee grounds slowly enough to extract the maximum amount of flavor. If the grind is too coarse, the espresso will be weak and watery.
If you are experiencing any of these problems, try adjusting the grind size. You can do this by turning the grind adjustment knob on the grinder. Start with a coarse grind and then adjust it finer until you get the desired results.
Why is it Important to Clean the Grinder Regularly?
For a better coffee experience, it’s important to keep your grinder clean. Over time, stuff like old coffee and tiny pieces from the beans can build up inside it. This buildup can cause problems like clogs and the grinder stops working properly.
When you make coffee, oils from the beans stick around inside the grinder. If you don’t clean them off, they can get smelly and make your coffee taste weird. They’re hard to remove if they’re not cleaned for a longer time, and this can change how your coffee tastes.
The leftover coffee bits and junk can also make the grinder difficult to grind as well. It might not grind the coffee evenly, which can mess up how your coffee tastes when you brew it. It’s like some parts will be too strong and others will be too weak in the same cup.
If the grinder gets really clogged, it has to work extra hard to grind the coffee. This can damage the parts inside the grinder and even make the grinder stop working. It’s like a car’s engine getting too hot if it has to pull a heavy load.
To prevent these problems, it’s a good idea to clean your grinder at least once a week, or more often if you use it frequently. You can also descale your grinder every few months to remove mineral deposits that can build up and cause problems.
Breville Grinder Keeps Jamming
When you overfill the grinder, the beans can get stuck between the burrs and cause the grinder to jam. This can happen because the beans are not able to move freely through the grinder and they can get crushed and stuck.
To avoid this problem, it is important to only fill the grinder with the amount of beans you need for your coffee. The exact amount of beans you need will depend on the type of coffee you are making and the number of cups you are brewing. However, as a general rule of thumb, you should only fill the grinder to about half its capacity.
If you overfill the grinder, you can try to clear the jam by turning the grinder on and off a few times. If this does not work, you may need to disassemble the grinder and remove the beans manually.
Breville Coffee Maker with Grinder Problems (Stale Beans)
The Breville grinder might not work properly if it is using stale beans. When coffee beans are roasted, they release carbon dioxide gas. This gas helps to keep the beans fresh and flavorful. However, over time, the gas will disperse and the beans will start to stale.
Stale beans will not grind as evenly as freshly roasted beans. This is because the beans have become brittle and they will crumble more easily. Stale beans will also not taste as good as freshly roasted beans, because the flavors in the beans will start to fade over time.
The Breville grinder might also struggle to work properly with stale beans. The dry and uneven texture of the beans can clog up the grinder and make it harder for the machine to do its job. It’s like trying to push something sticky through a small hole, it can get stuck.
| Grinder Models | Recommended Beans Type | Explanation |
|---|---|---|
| Espresso Grinder | Espresso Beans | Espresso grinders are designed to grind beans into a fine powder for espresso. They typically have burrs that are very close together, which produces a consistent grind size. Espresso grinders are typically more expensive than other types of grinders. |
| Drip Grinder | Drip Coffee Beans | Drip grinders are designed to grind beans into a medium-coarse grind for drip coffee. They typically have burrs that are spaced further apart than espresso grinders. Drip grinders are less expensive than espresso grinders. |
| Burr Grinder | Various Beans | Burr grinders use two rotating burrs to grind the beans. Burr grinders are considered to be the best type of grinder for coffee because they produce a consistent grind size. |
| Blade Grinder | Various Beans | Blade grinders use a blade to chop the beans. Blade grinders are not as precise as burr grinders and can produce inconsistent grind sizes. Blade grinders are the least expensive type of grinder. |
| Manual Grinder | Various Beans | Manual grinders are operated by hand. Manual grinders are the least expensive type of grinder and can be a good option if you are on a budget. However, they can be time-consuming to use. |
Will Oily Coffee Beans Clog the Grinder?
Certain types of coffee beans are known to be oily, and when these beans are used in a grinder without proper cleaning, it can lead to a range of problems. These oily beans can be a bit like greasy food – they leave behind a residue that can be difficult to clean up.
As you grind oily beans, the oils they contain can coat the grinder’s internal parts. Over time, this oil buildup can accumulate and mix with coffee grounds, forming a sticky and thick paste. Think of it as a gunky mess that gets harder to remove the longer it’s left alone.
Now, this oily residue can clog up the grinder’s mechanisms. The clogs can slow down or even halt the grinding process, affecting the machine’s efficiency. In your Breville grinder, this could mean that it takes longer to grind the beans, or it might not grind them consistently.
Maintenance of Breville Grinder Matters
The quality of your coffee grounds can be noticeably affected if you don’t follow the grinder’s recommended maintenance schedule, which includes crucial activities like replacing worn burrs (the components that actually grind the coffee) and keeping the working parts oiled.
Due to the frequent grinding of coffee beans, burrs weaken over time. Burrs can no longer grind the beans as efficiently or consistently when they are worn out. As a result, some beans are ground too coarsely while others are ground too finely.
The smooth operation of the grinder’s moving parts depends on proper lubrication. These components get stiffer or become less resistant to friction if improper lubrication is not used. This friction in your grinder could result in more heat buildup and stress on the motor, possibly leading it to wear out more quickly.
You can Check Out How to Maintain Your Breville Espresso Machine in the below article;
How to Clean a Breville Espresso Machine Daily 4 Steps & Deep Clean Guide
Check the Burrs of your Breville Grinder
Your grinder’s burrs do the heavy lifting of turning whole coffee beans into ground coffee. Due to the friction and pressure of grinding coffee beans, burrs may damage over time and become cracked, broken, or worn out. If you neglect them, a number of problems that affect both the coffee’s quality and the grinding process may arise.
Burrs are unable to perform their duties effectively if they are damaged or worn out. This means that some beans might get ground more finely than others, creating an inconsistent grind.
Moreover, damaged burrs can affect the flavor of your coffee. When burrs are worn, they generate more heat during grinding. This heat can cause the natural oils in coffee beans to degrade and even turn rancid, altering the taste of your brew.
Frequent Use can also Affect Breville Grinder
When you’re using your grinder, it’s important to give it a bit of time to catch its breath. Grinding coffee beans rapidly, especially one batch after another without any breaks, can put a lot of strain on the grinder’s motor and cause it to overheat. Here’s why:
Grinding coffee is a bit like exercise for the grinder’s motor. Just as running without any rest can exhaust you, grinding without breaks can tire out the motor. The friction and pressure from crushing the beans into fine ground generate heat, and doing this continuously can make the motor become excessively hot.
An overheated motor isn’t in its best working condition. It can lead to wear and tear, potentially shortening the lifespan of the motor and other components. The excess heat can cause the motor’s internal parts to expand, and this constant expansion and contraction can contribute to their degradation over time.
To prevent this, it’s a good idea to give your grinder short breaks between grinding batches. This allows the motor to cool down and recover, maintaining its efficiency and prolonging its lifespan.
Why is it important to empty the doser of your Breville grinder after each use?
The doser is the compartment in your grinder that holds the freshly ground coffee before it’s dispensed into the portafilter or another container. When coffee grounds remain in the doser for an extended period, they can become stale and lose their freshness. This can lead to a number of problems including weak and watery coffee, the growth of Mold and Mildew, and various other Breville grinders performance problems.
If You are Facing Pressure Issues With Your Breville Espresso Machine Follow This Guide;
Diagnose Breville Espresso Machine no Pressure Issue and Solve It
How to empty the doser of your Breville grinder?
To empty the doser of your Breville grinder, follow these steps:
- Unplug the grinder and remove the bean hopper.
- Remove the doser from the grinder.
- Empty the contents of the doser into the trash.
- Wipe the inside of the doser with a damp cloth.
- Reassemble the grinder.
Moreover, If you are still facing any issues contact the Breville support team. They will surely solve your issues.
Conclusion
In Conclusion through this article, we’ve explored the most common problems faced by users of Breville coffee makers and provided insightful solutions to ensure your coffee experience remains exceptional.
From uneven grinding to jammed grinders, we’ve covered a range of issues that might arise. By understanding these problems and their fixes, you’re equipped to tackle them easily, ensuring your grinder consistently delivers the desired results. Additionally, we highlighted the significance of correct maintenance and usage, the role of regular cleaning, and the importance of proper bean selection.
By following the tips in this article, you can help ensure that your Breville coffee maker grinder is always working properly and that you are always enjoying fresh, flavorful coffee.
How do you fix a stuck coffee grinder?
First, switch off and unplug the grinder for safety.
Carefully look inside for any leftover coffee grounds or foreign objects that might be causing the jam.
Remove the hopper and any beans. Clean out any grounds or debris that might be clogging the burrs.
If the beans are still stuck, you may need to disassemble the grinder and remove them manually.
Check the burrs for any signs of damage. If they are chipped or cracked, they might need to be replaced.
Once the beans are removed, clean the grinder thoroughly with a damp cloth.
Reassemble the grinder and plug it back in.
How do I fix my grinder not spinning?
Make sure the outlet is functional and the power cord is properly connected. Check the fuse if present, and replace it if it’s blown. Look into the motor if it’s not spinning, it could be damaged and need replacement. Inspect the burrs responsible for grinding beans, if they’re damaged or clogged, they can affect the grinder’s movement. Clean or replace them accordingly. Avoid overloading the grinder as too many beans can lead to blockages. Stick to the recommended amount of beans for grinding.
How do you unclog a grinder?
To unclog a grinder, start by unplugging it and emptying the hopper. Check for visible obstructions in the grinding chamber and remove them. Use a vacuum or compressed air to dislodge deeper clogs. Turn the grinder on and off to shake loose the clog, and gently tap the sides. If the clog persists, consider disassembling the grinder following the manufacturer’s instructions. Clean all parts thoroughly, especially the grinding chamber and burrs. Reassemble and test the grinder by grinding a small amount of beans.