If you’re here, you probably have a problem with your beloved Keurig coffee maker and are wondering how to reset Keurig after descaling. Don’t worry; we’ve got you covered if you’re having issues with touchscreens that aren’t responding, persistent alert lights, strange brewing behavior, or error messages. These problems can frequently be fixed by resetting your Keurig, which will also get your brewer back to working at its best.
Though Keurig machines typically don’t have a dedicated reset button, we’ve gathered tried-and-true instructions from a variety of sources to help you successfully reset your coffee maker. We’ll walk you through the process of resetting in this extensive guide, giving you the answers you need to sip your preferred beverage without difficulty. Consequently, let’s get started and restart your Keurig!
How to reset keurig after descaling
Resetting your Keurig after descaling is a simple 5 step process that helps restore the machine to its factory settings. Here are the steps to reset your Keurig;
- Turn off your Keurig coffee maker and unplug it from the power source.
- Wait for a few minutes to ensure that the machine is completely powered down.
- Plug the Keurig back into the power source.
- Turn on the machine and allow it to go through its startup process.
- Once the machine is powered on, it is reset and ready for use.
Keurig Coffee Model Reset
- Keurig K155
- Keurig K Duo Plus
- Keurig K Supreme Plus
- Keurig 2.0
- Keurig Mini Reset
How to Reset Keurig K-155
Resetting the Keurig K-155 model can be accomplished by following the steps below:
- To begin, ensure that the Keurig K155 is unplugged from the power source and turned off.
- Empty the water reservoir by removing it from the brewer and dumping any water that is still inside. After that make sure the water reservoir is securely seated on the brewer before reinstalling it.
- Reconnect the Keurig K155 to the power source and turn it on to start brewing.
- Press and hold the power button on the front of the brewer for about five seconds to perform a power cycle. This action will reset the device.
- The Keurig K155 will go through a startup process, and the lights on the device will flash as it gets ready to operate. Be patient while it does this.
- Run a purifying brew by setting a cup or mug on the drip tray and starting the brew cycle without adding a K-Cup pod. To make a cleansing brew, choose the largest brew size that is offered. This procedure aids in removing any leftover coffee or tea from the brewer’s internal parts.
- If necessary, Repeat the cleansing brew procedure if the water flow is still subpar or if the taste of the previous brew is still detectable.
- Fresh water should be added to the water reservoir after the cleansing brew has finished. Empty the cup and do this.
- The Keurig K155 should now be reset and prepared to brew the beverage of your choice.
How to Reset Keurig K Duo Plus Coffee Maker
Here are the steps to reset a Keurig K-Duo Plus brewer:
- Disconnect and unplug the Keurig K-Duo Plus from its power source.
- If there is still water inside the water reservoir, remove it from the brewer and empty it.
- Install the water reservoir back on the brewer and ensure it is seated securely.
- Power up the Keurig K-Duo Plus and turn it on.
- Using a pen, paperclip, or other similar object, press and hold the reset button for approximately five seconds.
- After pressing and holding the reset button, let go of it.
- During the resetting process, the Keurig K-Duo Plus’s lights may briefly flash or go out.
- You might need to repeat the initial setup steps, such as programming your preferred brew settings and setting the time, after the reset.
Now that it has been reset, your Keurig K-Duo Plus is ready to be usable. Keep in mind to refill the water reservoir and follow the brewing directions for the coffee or beverage you want to make.
How to Reset Keurig K Supreme Plus
You can adhere to these methods to reset a Keurig K Supreme Plus coffee maker:
- Ensure that the machine is unplugged and powered off before Resetting.
- The water reservoir should be removed and drained.
- Install the water reservoir securely on the machine before reinstalling it.
- Turn on the Keurig K Supreme Plus by connecting it to the power source.
- To access the services menu, press and hold the “STRONG” and “10 oz” buttons on the control panel simultaneously until the screen displays “Service Menu.”
- Click the “STRONG” button twice from the service menu to access the “Reset Menu.”
- On the control panel, select “Factory Reset” using the arrow buttons, and then push “10 oz” to choose it.
- An alert will appear on the screen, asking for confirmation. A final reset can be completed by pressing the “10 oz” button once more.
- During the reset procedure, the Keurig K Supreme Plus will display various messages on the screen. Wait for the reset to be finished. Give the device a few seconds to finish the reset.
- After the reset is complete, you might need to go over the fundamental setup procedures once again to program your preferred brew parameters and set the time.
How do I reset my Keurig 2.0 after descaling?
Resetting the Keurig 2.0 is the same as for other models. So, the main steps to reset this model are as follows:
- To enter the menu, click the “Settings” button on the control panel.
- Access “Maintenance” by using the touch screen or buttons to browse the menu choices. Select the “Maintenance” or “Settings” menu item by searching for it.
- Start the reset process by selecting “Reset to Factory Settings” or a comparable option from the Maintenance menu. To start the reset mode, choose it.
- A confirmation message from the device will ask you if you wish to carry out the reset. By selecting “Yes” or a comparable option, confirm the reset.
- The Keurig 2.0 will go through a reset procedure, which may take a few seconds to finish. Don’t halt the procedure in between.
- You might need to repeat the basic setup procedure, including establishing the language, time, and brew settings, after the reset is finished.
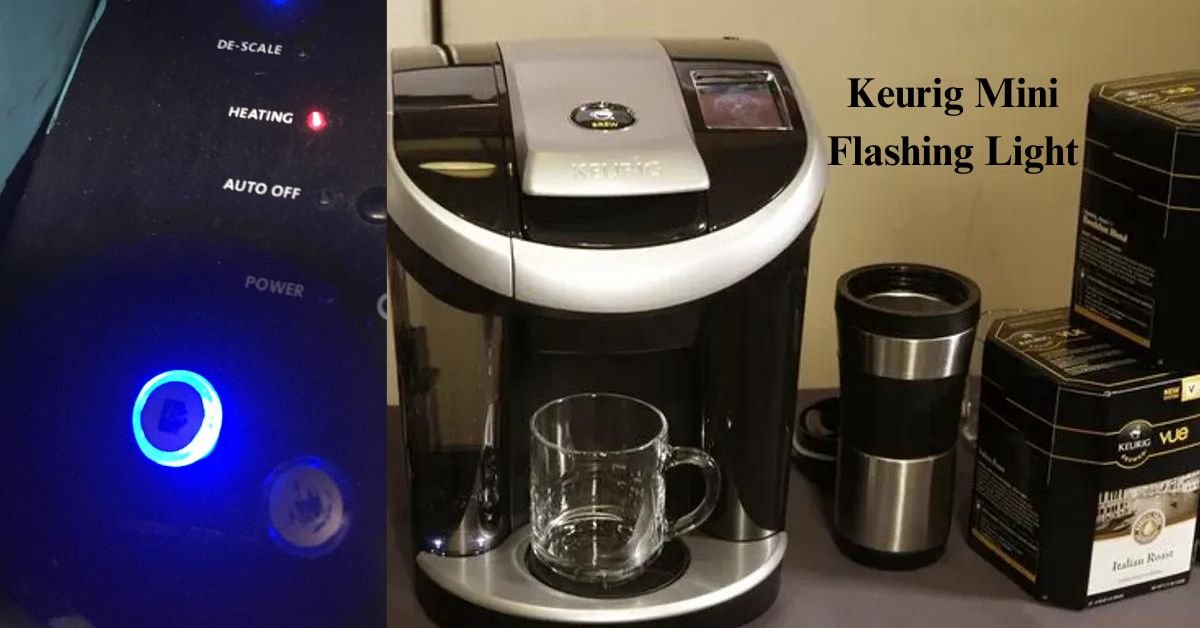
Resetting a Keurig Mini Simple Guide
Here are some instructions for resetting our Keurig mini coffee maker.
- Reconnecting the Keurig Mini to its power supply will turn it on.
- Permit the Keurig Mini to warm up and stabilize for a few minutes before using it.
- Set a mug or cup on the drip tray, remove any pods, and place the mug or cup on the drip tray. The machine will be ready for the reset procedure after this step, which helps to remove any residue.
- When the machine is still on, disconnect the Keurig Mini from the power supply.
- Allow the coffee maker to shut down completely by unplugging it for a few minutes.
- Connect the Keurig Mini to the power supply after the timer has expired.
- On the Keurig Mini, press the power button.
Here is a detailed guide about Resetting Keurig K-Compact
How to Reset Your Keurig K-Compact (Easy 6 Steps for a Fresh Start)
Reset Your Keurig Coffee Maker (Additional Steps)
One common cause of various issues with Keurig coffee makers is a clogged exit needle. If you have tried resetting your Keurig and the problem persists, it is worth examining the pod holder for excessive buildup of coffee grounds around the needle. In such cases, cleaning the needle using the provided tool or employing the paper clip method may resolve the issue.
However, if none of these methods prove effective in resolving the problem, it is recommended to seek assistance from Keurig support. Contacting Keurig support ensures that you receive expert assistance and can help address any underlying issues with your coffee maker.
Conclusion
In conclusion, rebooting your Keurig coffee machine may often fix a variety of problems and return it to peak functionality. Resetting the device may help it run more smoothly, regardless of whether you’ve run into error messages, brewing troubles, or other problems.
Step-by-step directions on How to Reset Keurig after descaling? including the Keurig K155, Keurig K-Duo Plus, Keurig 2.0, Keurig Mini, and Keurig K Supreme Plus, are offered throughout this comprehensive tutorial. You can efficiently resolve typical issues and restart your coffee machine by following these reset steps.
Remember that you must turn off the appliance, remove and replace the water reservoir, and adhere to the particular reset instructions for your model before starting a reset. You may need to repeat the basic setup procedure when the reset is finished, including modifying settings and preferences.
What are strong settings on Keurig?
Keurig coffee makers typically offer a range of brew strength settings, including “Regular,” which is the default setting for a standard-strength cup of coffee, “Strong,” which produces a more concentrated and robust brew by slowing down the brewing process, and occasionally a “Bold” option, similar to “Strong,” for a bolder coffee. Some Keurig models may also have an “Extra Bold” setting, particularly for specialty coffee pods with a higher coffee-to-water ratio, resulting in an even stronger coffee.
How do you reset a Keurig after descale?
To reset your Keurig after descaling and address various issues, follow these steps for different models. For the Keurig K155, unplug it, remove and reseat the water reservoir, plug it back in, and power it on while holding the power button for five seconds. The Keurig K-Duo Plus requires disconnecting, emptying the reservoir, securely reinstalling it, pressing and holding the reset button for five seconds, and repeating the initial setup steps. To reset the Keurig K Supreme Plus, unplug, remove, and reseat the reservoir, then press and hold the “STRONG” and “10 oz” buttons for the service menu, select “Factory Reset,” and confirm. For the Keurig 2.0, access the menu, choose “Reset to Factory Settings,” confirm, and repeat setup. With the Keurig Mini, unplug while it’s on, wait, and plug it back in. Cleaning the exit needle may help with persistent issues, and if problems persist, contact Keurig support.
How to do a hard reset on Keurig Duo?
To perform a hard reset on your Keurig Duo, follow these steps: Unplug the machine and remove the water reservoir. Wait for about 5-10 minutes to ensure it’s fully powered down. Then, plug it back in, power it on, and run a water-only brew cycle without a coffee pod to flush the system. Additionally, you can hold the 8 and 10 oz buttons simultaneously for 6 seconds to complete the reset. After the reset, you may need to reprogram your preferred settings.
Why is the descaling light still on after descaling?
If the descaling light remains on after descaling your coffee maker, Run additional water-only cycles to flush out any residual solution or mineral deposits. Clean the descaling indicator sensor if it’s dirty or malfunctioning. If the issue persists, it could be a software glitch; consider performing a hard reset if available for your model or contact customer support for assistance. In cases of heavy-scale buildup, multiple descaling cycles may be necessary to completely remove deposits.